Setup guide
The complete walkthrough — create a network, add backends, point DNS, verify everything.
This page is the complete walkthrough — every checkpoint, every option explained. Allow ~5 minutes if your DNS is already in your control.
What you’ll have at the end
- A network in your account that accepts player connections on Infinity-Filter’s edge.
- One or more backends attached to that network — your real Minecraft servers.
- One or more domains verified and pointing at the network via CNAME.
- Real-time mitigation against L3/L4 and L7 attacks, with optional anti-bot, country/ASN filtering and Discord webhooks.
Step 1 — Create the network
Open panel.infinity-filter.com. At the top of the sidebar, click the + button next to the active-network chip.
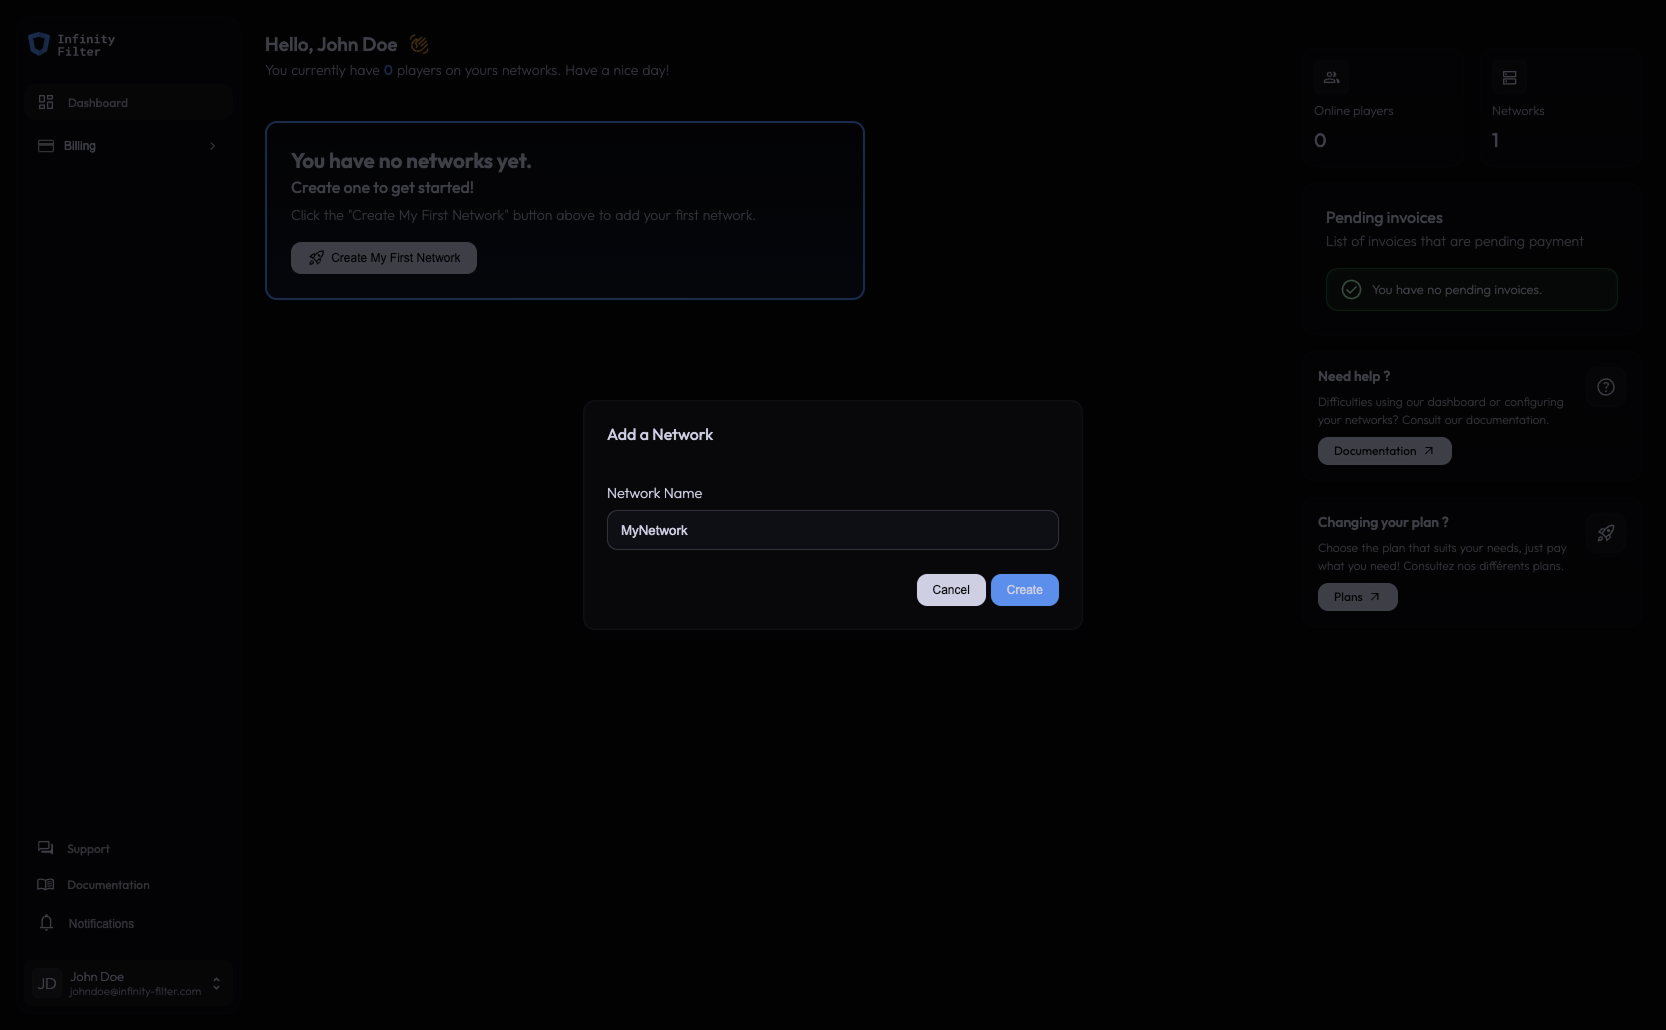
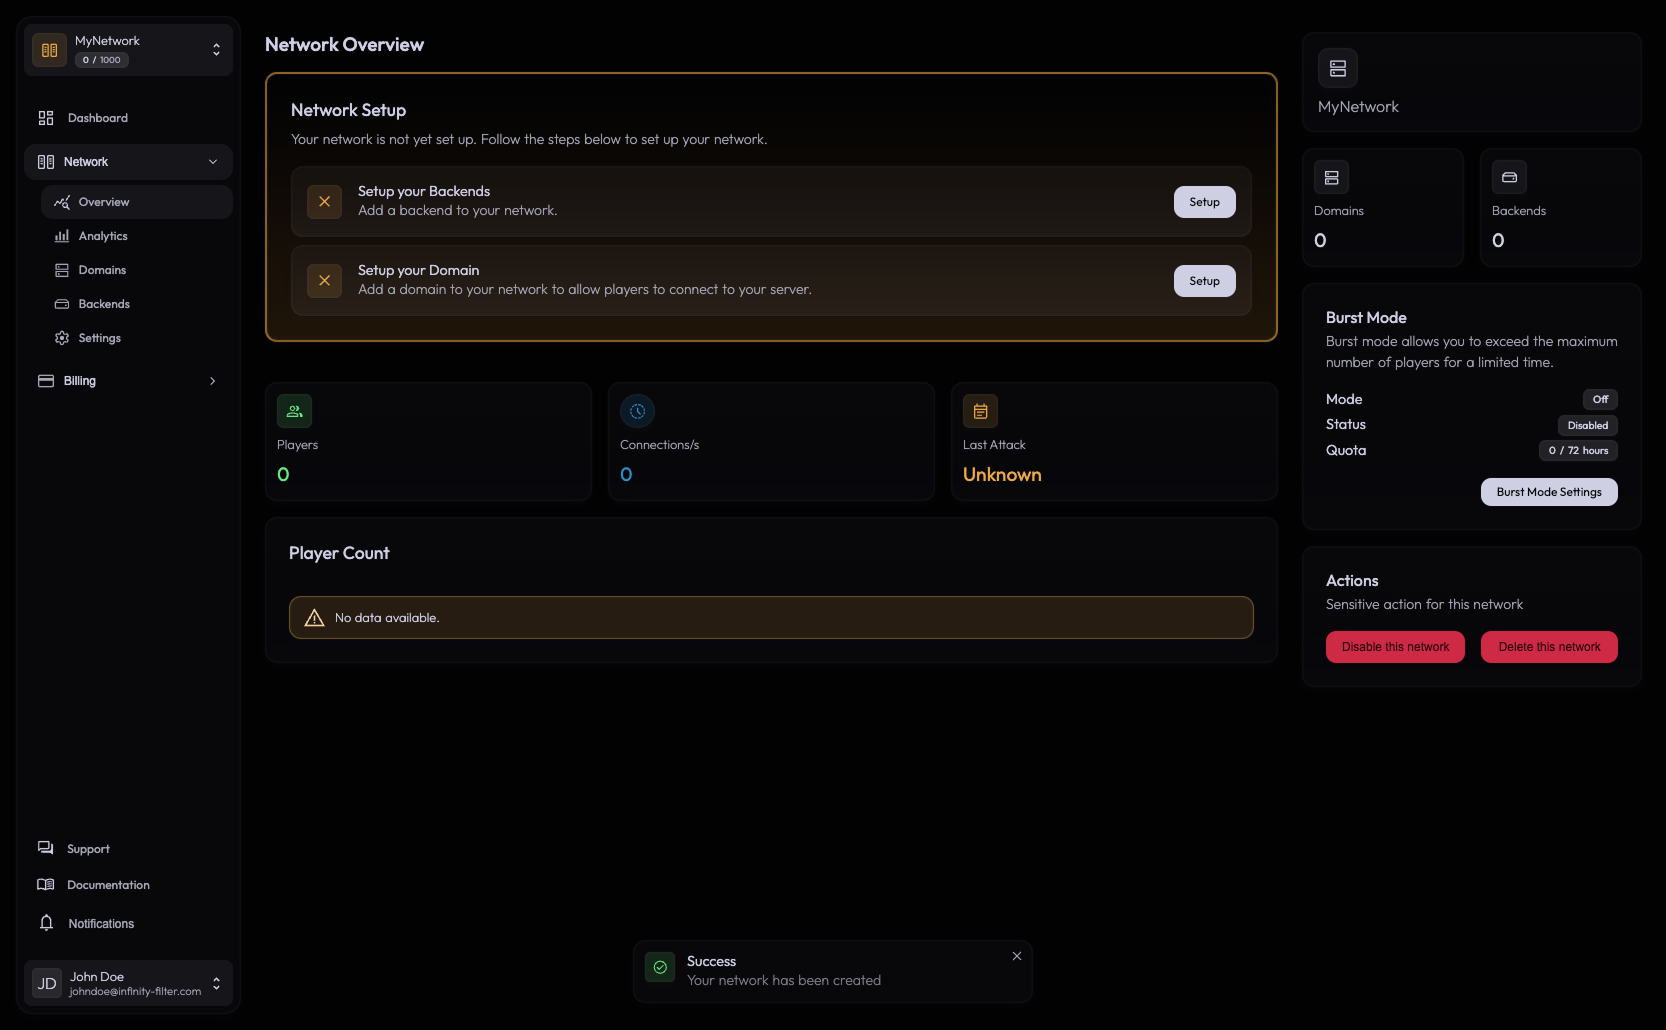
Give the network a name (it’s a label visible only to you), and confirm. You land on the Network → Overview page with two pending setup tasks:
- Set up your backend(s) — your real Minecraft server(s).
- Set up your domain(s) / subdomain(s) — the hostname players will use.
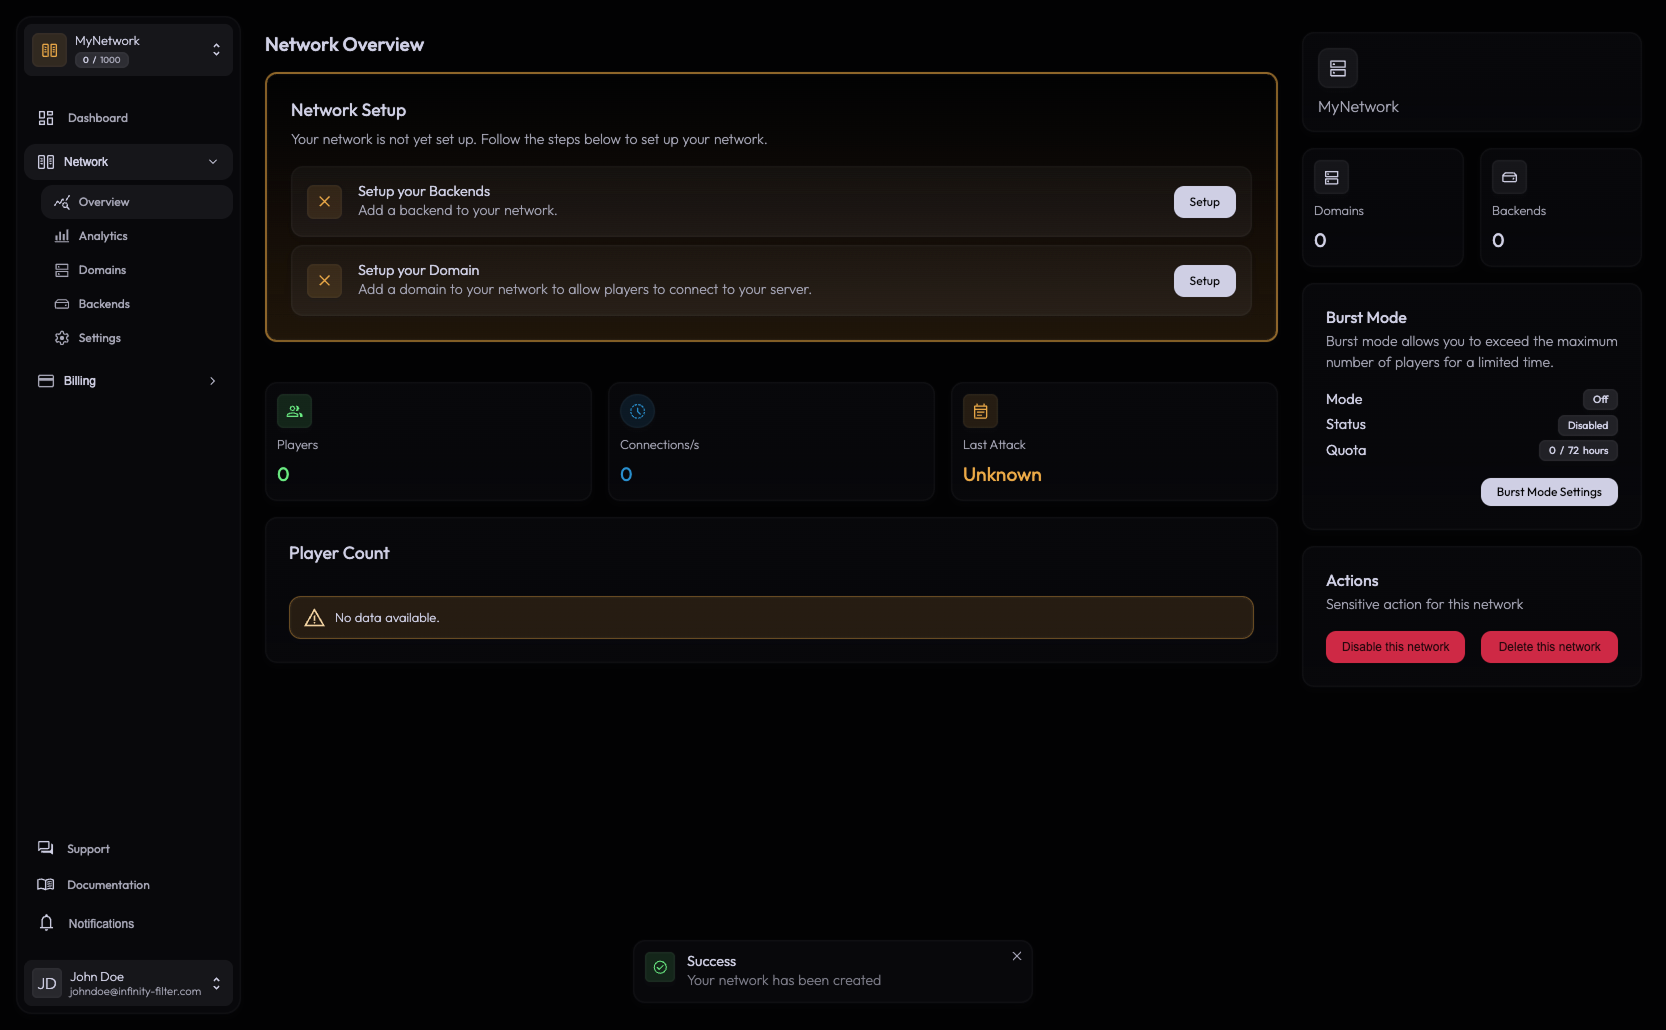
The network stays inactive until both tasks are completed.
Step 2 — Add your backend
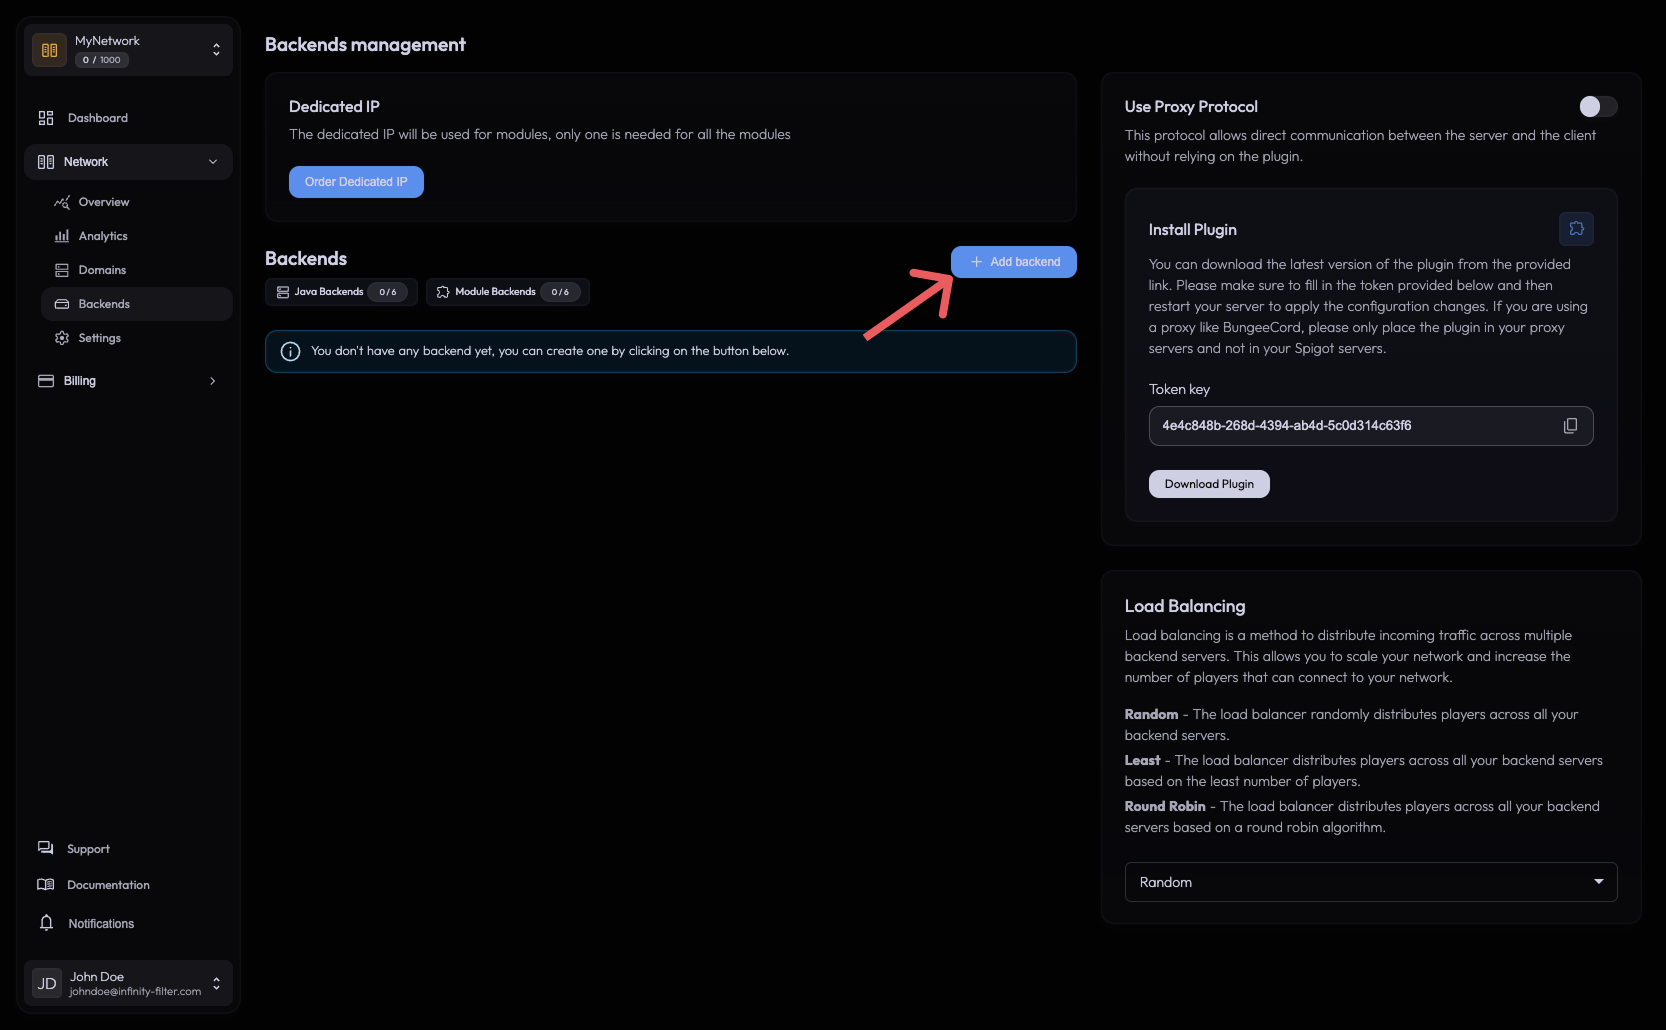
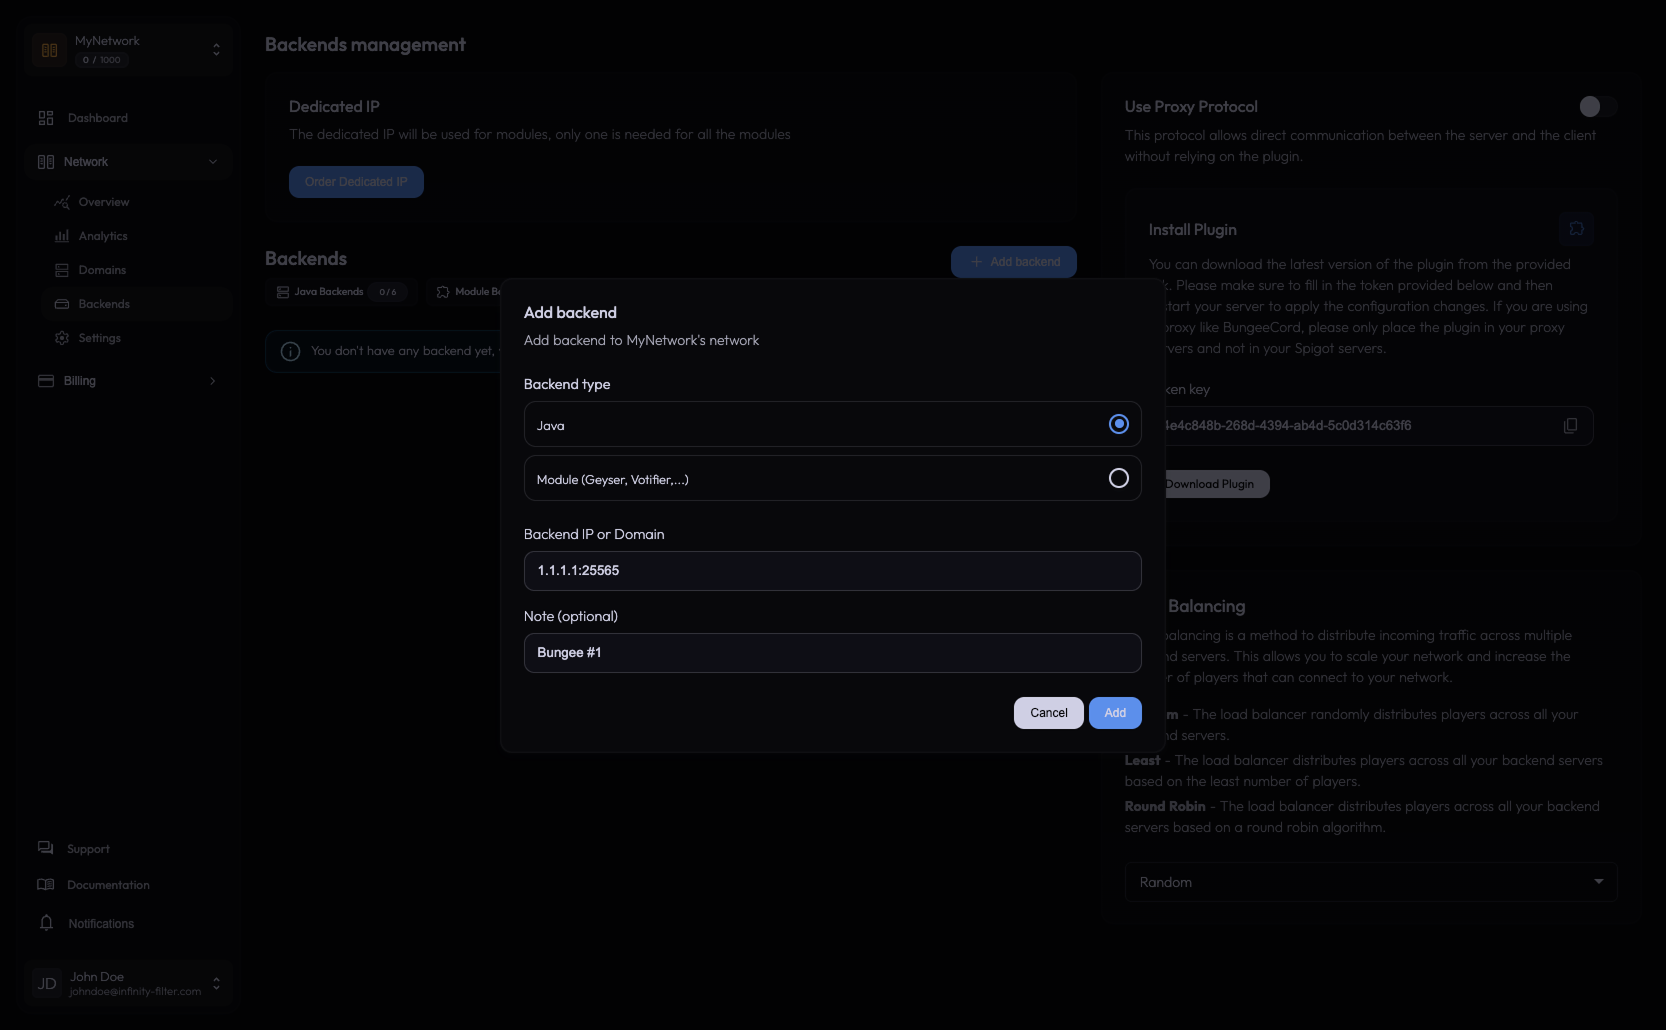
Open Network → Backends and click Add backend. Choose Java (the default — Bedrock and voice modules come later).
Enter the backend’s ip:port. The panel accepts IPv4 (203.0.113.10:25565) and IPv6 ([fd42:42:42::1]:25565).
Real player IPs aren’t forwarded yet — that’s the final step, once the route is live. For now the backend just needs to exist so the Latency Test can reach it.
Step 3 — Add a domain
Open Network → Domains and click Add domain. Type the hostname your players connect with (e.g. play.example.com) and save.
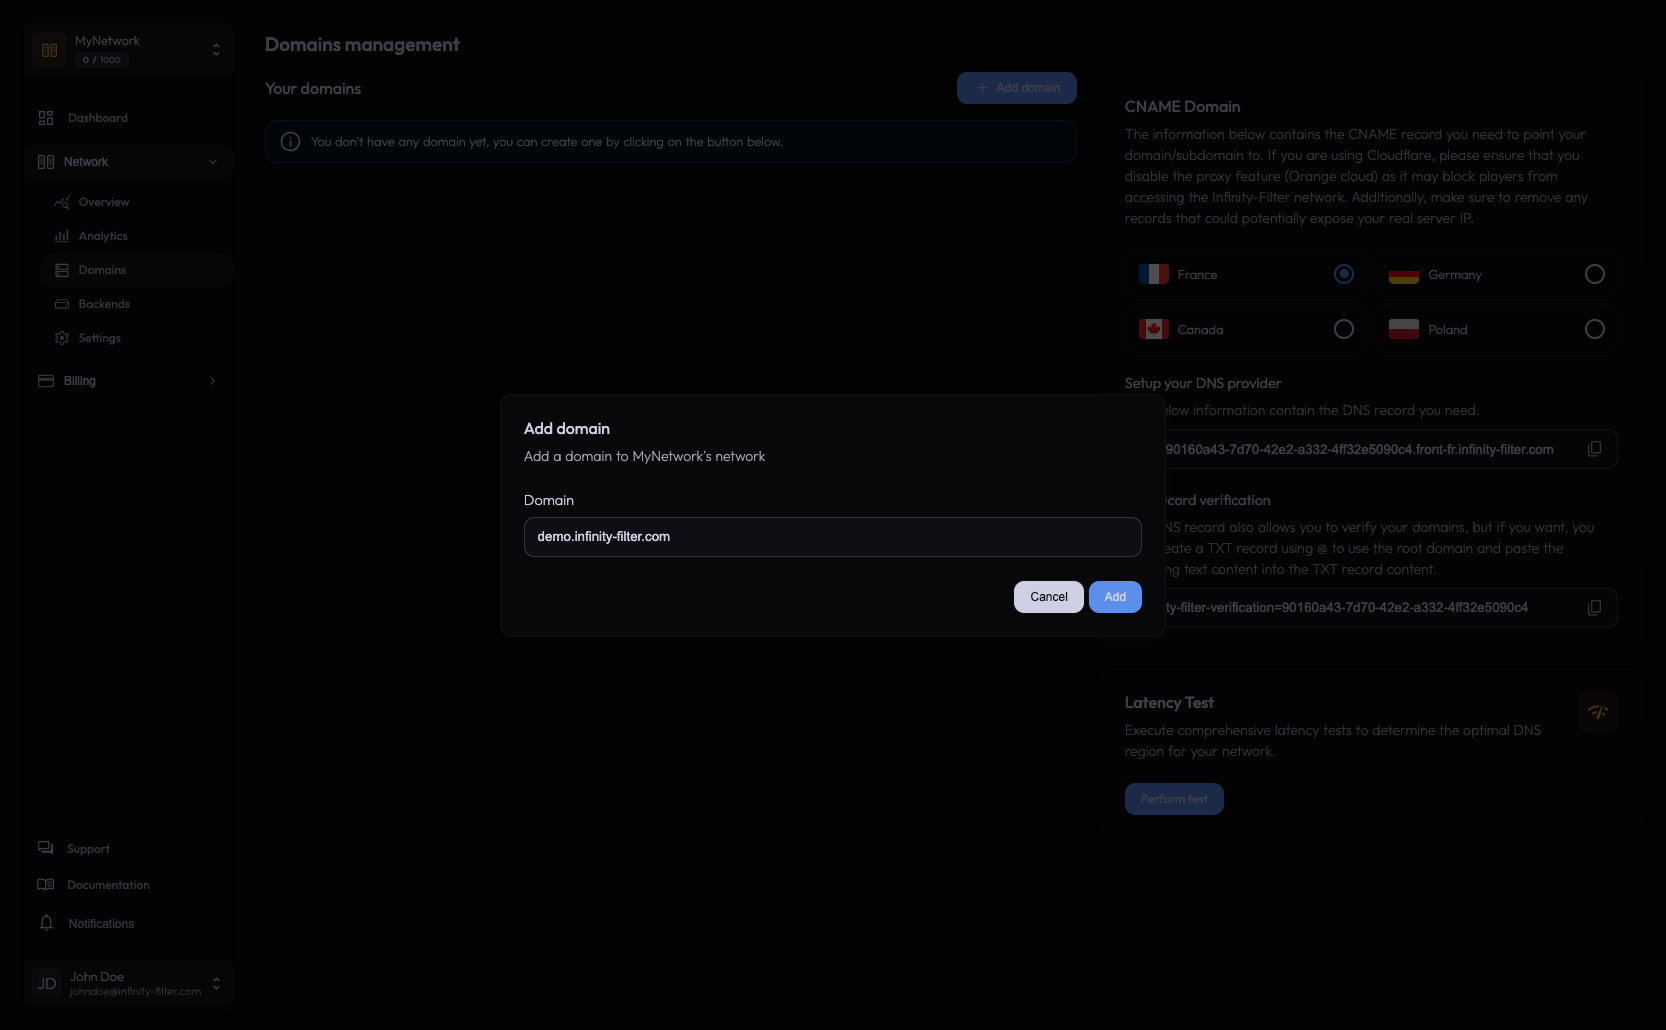
On the right side of the page, the CNAME card appears, with a region picker. You’ll pick the region in the next step; for now note the two records it can reveal:
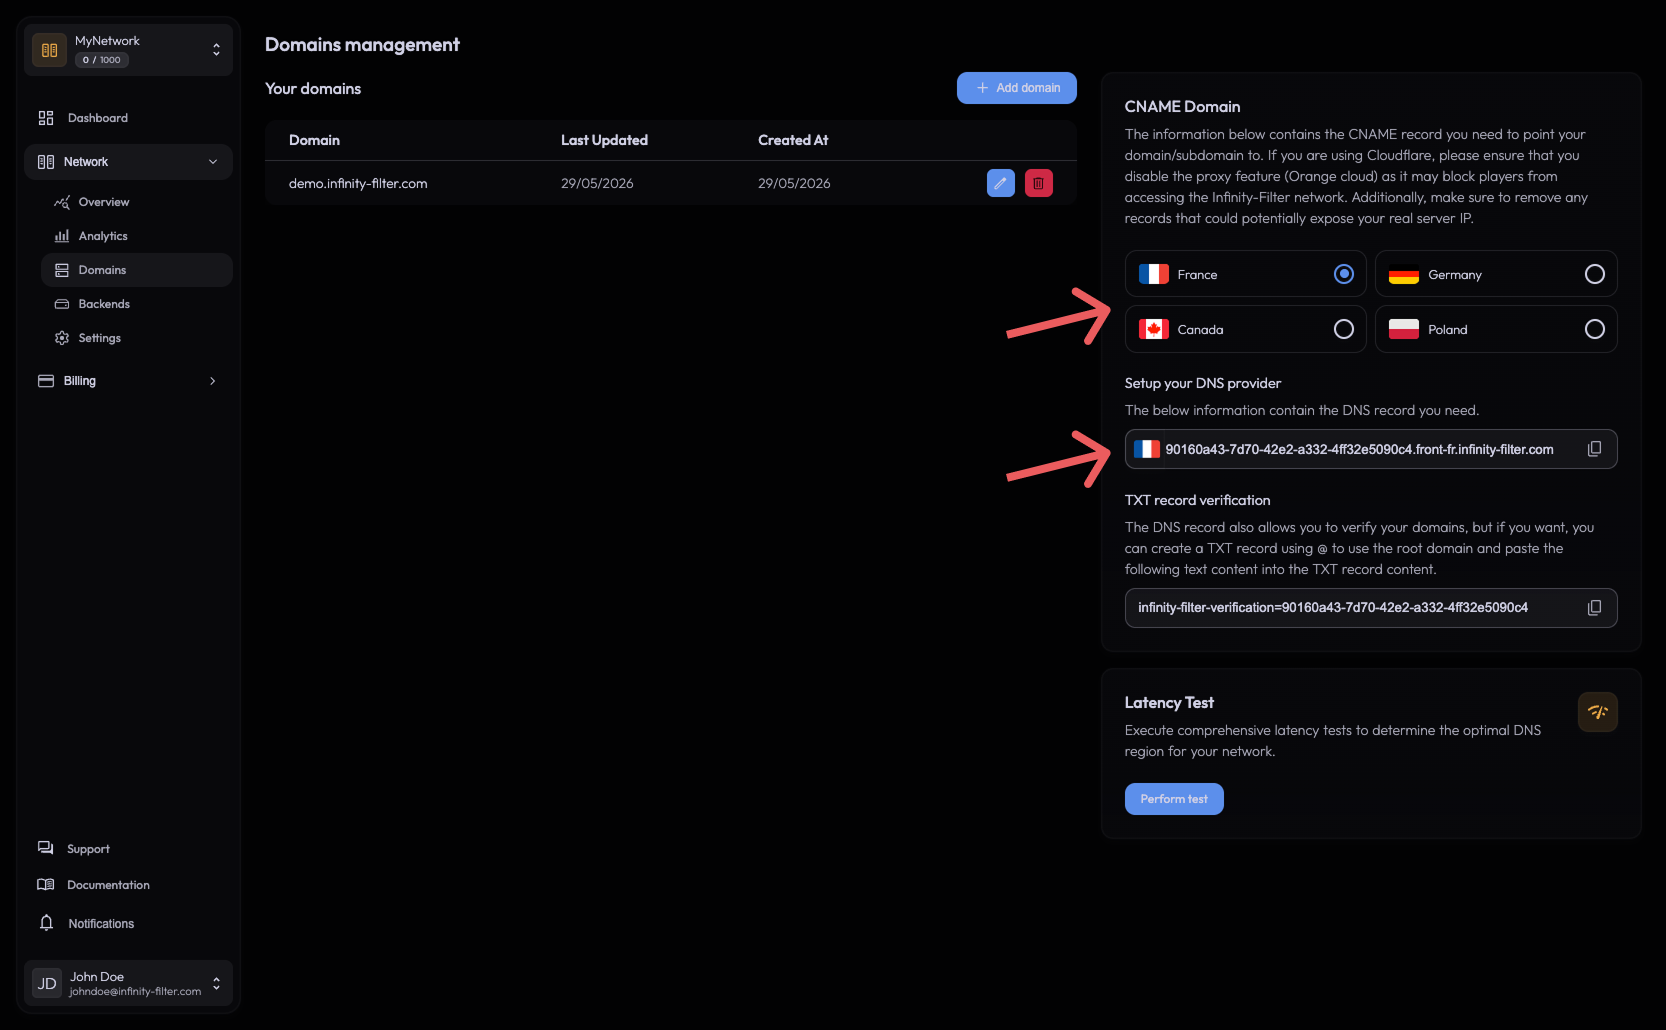
- A CNAME suffix (
<uuid>.front-<location>.infinity-filter.com) that this hostname must resolve to. This is all you need — pointing the CNAME at Infinity-Filter both routes traffic and proves you control the domain, so the panel verifies it automatically. - A TXT verification record (
infinity-filter-verification=…) — an optional fallback, created on the root domain (Name =@) by pasting the text the panel gives you. The CNAME alone is enough, but we still recommend adding it: if the CNAME ever can’t be verified (e.g. you keep the apex on another proxy, or DNS propagation is being stubborn) the TXT keeps the domain verified.
Step 4 — Pick the right edge region
Now choose which PoP this domain routes through. Open Network → Latency Test and ping your backend from each PoP.
The PoP with the lowest RTT to your backend is the right one. Adjacent EU regions (DE / PL / FR) usually differ by only a couple of milliseconds — pick whichever has the lowest number. Back on the Domains page, click that region’s flag on the CNAME card to reveal the records for it.
Step 5 — Create the DNS record
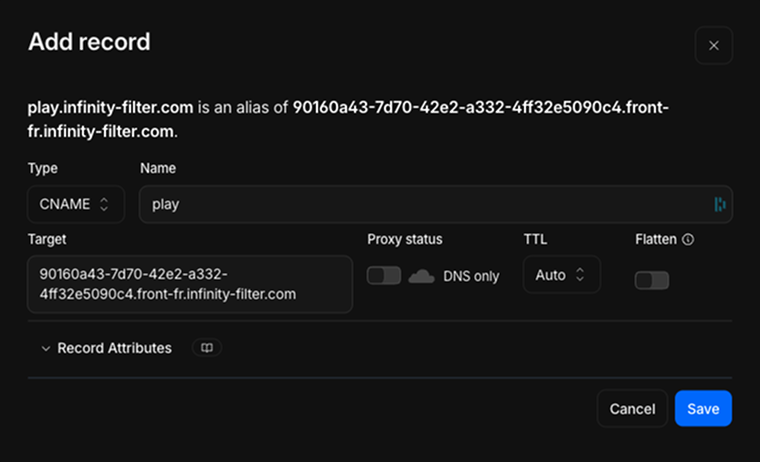
At your DNS provider, create the CNAME exactly as the panel printed it. That single record is enough to verify and route the domain — we also recommend adding the TXT record as a fallback.
In Cloudflare’s DNS tab:
- Add a CNAME record. Name =
play. Target = the CNAME from the panel. Proxy status = DNS only (grey cloud). - (Recommended fallback) Add a TXT record. Name =
@(the root domain). Content = paste the text the panel gives you verbatim.
Open your provider’s DNS zone editor:
play.example.com.   300   IN   CNAME   {uuid}.front-de.infinity-filter.com.

# Recommended fallback — Name = @ (root domain); the CNAME alone already verifies.
example.com.   300   IN   TXT   "infinity-filter-verification=..."
A TTL of 300 seconds is fine.
Once the CNAME resolves, the panel verifies the domain automatically — usually within a minute. The Domains table marks the entry as verified and the network goes active.
Step 6 — Forward the real player IP
The route is live, but there’s one thing left. Because every player now connects through Infinity-Filter’s edge, your backend sees a single edge IP for everyone — your anti-cheat, ban-by-IP, geo plugins and logs all collapse to that one address. Forwarding fixes this by handing the player’s real IP to the backend.
There are two mutually exclusive ways to do it. Pick one — never both.
PROXY protocol prepends the real client address to each connection at the TCP layer. It’s the cleanest option and works with any plugin, because the IP is restored before Minecraft even sees the connection.
1. Enable it on the panel. Open Network → Backends, select your backend, and turn PROXY protocol on (right-side toggle).
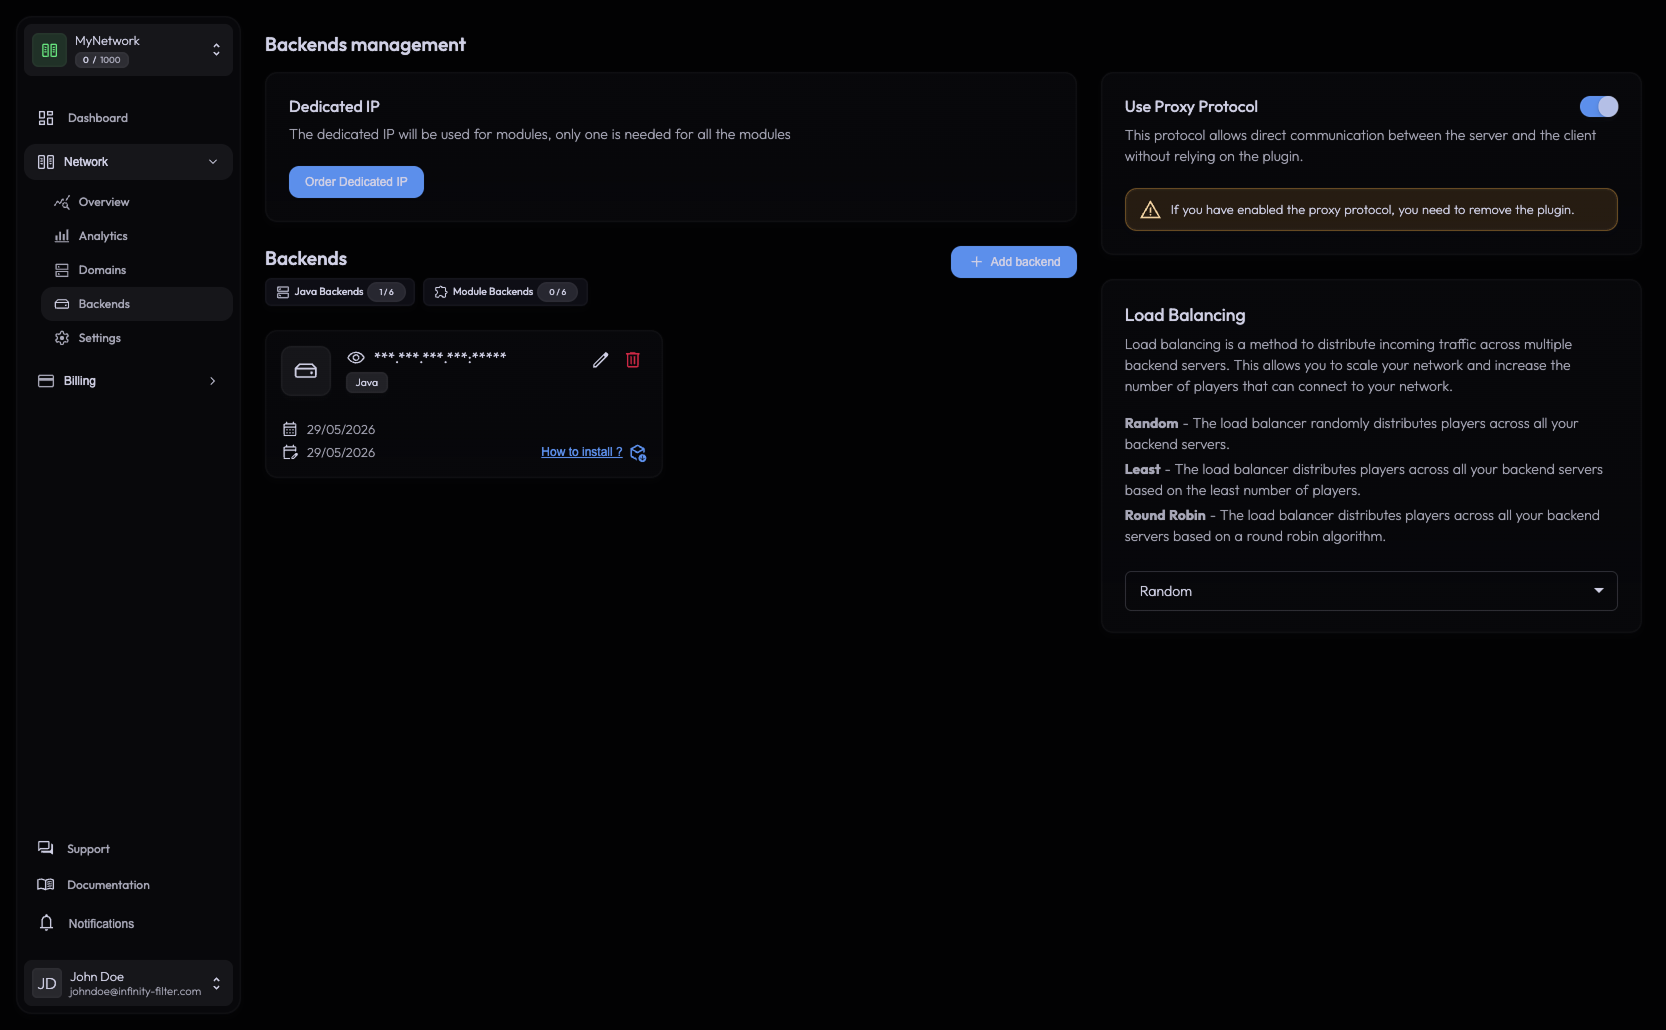
2. Enable it in your proxy software so it expects the prepended header.
[advanced]
haproxy-protocol = true
proxy_protocol: true
For a standalone Paper server with no proxy in front, enable PROXY protocol acceptance in paper-global.yml:
proxies:
  proxy-protocol: true
If your software can’t accept PROXY protocol, use the Infinity-Filter forwarding plugin instead. It restores the real IP from inside a plugin rather than at the TCP layer.
1. Leave PROXY protocol OFF on the Backends page.
2. Download the plugin from the right-side card on Network → Backends and drop the jar into your backend’s plugins/ folder.
3. Configure the token. The plugin authenticates with the per-network token printed in the panel — paste it into the plugin config so only Infinity-Filter’s traffic is trusted.
See the Infinity-Filter plugin reference for per-platform config.
See PROXY protocol for the full reference and how to verify the real IP is arriving.
You’re done
Players reach you through Infinity-Filter and the real IP is forwarded. The one thing left is to lock the backend down so nobody can bypass the edge by hitting your origin IP directly — allowlist Infinity-Filter’s IP ranges and default-deny everything else.
Last updated: May 28, 2026